Spacer Tools
Our Spacer Tools are designed specifically to make installation of designs with negative space a breeze. Simply find the correct spacer tool for your project, align the edges of each tile with the spacer, and use Felt Right adhesive tabs to hold your tiles to the wall.


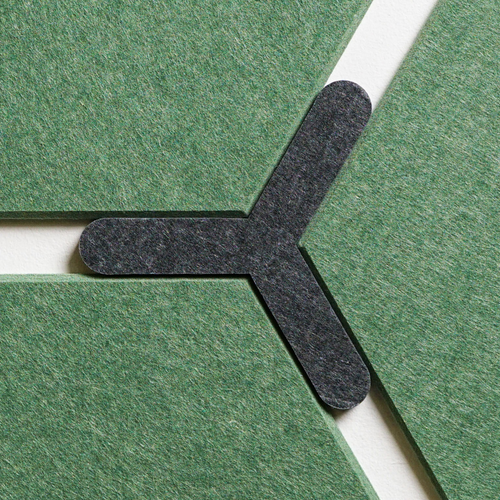
Hex 1-inch Spacing Tool
Recommended for use when installing hex/diamond designs with negative space between each tile.
Applicable Designs:
• Honeycomb
• Dragonfruit
• Nexus
• Harmony
• Spaced Hex Max
• Flower Petal
• Adobe Riptide

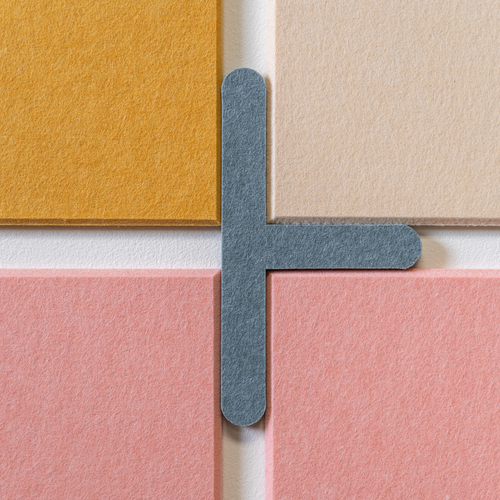
90 Degree 1-inch Spacing Tool
Recommended for use when installing square/rectangle designs with negative space between each tile.
Applicable Designs:
• Mosaic
• Ember
• Dynasty

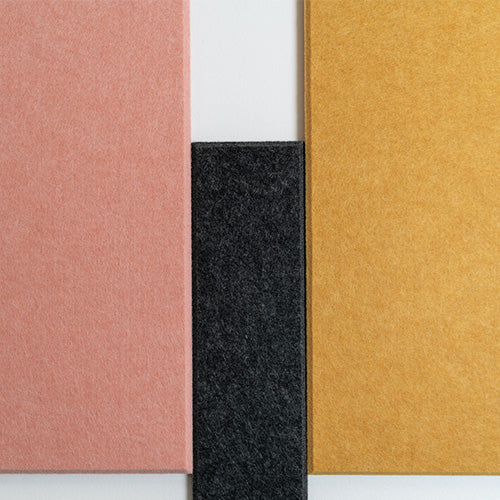
3-inch Rectangular Spacing Tool
Recommended for use when installing designs with larger negative space between each tile.
Applicable Designs:
• Midtown
• Mosaic Max
• Bamboo
• Baltic
• Tether
• Stream
• Dual Tone

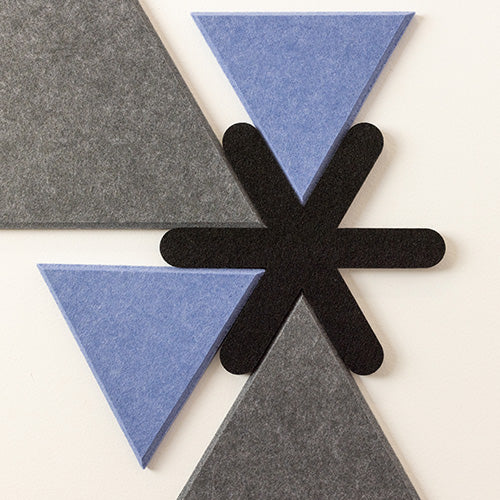
Equilateral Triangle Tool
Recommended for use when installing square/rectangle designs with negative space between each tile.
Applicable Designs:
• Borealis
• Arrow Head
See it in action:

Made in the USA!

Free Shipping over $99

50% Recycled Content

Expert Customer Service

Easy Returns

Design Support
What our customers are saying
Installation FAQs
For smaller, semi-permanent applications, we recommend using Felt Right commercial grade adhesive tabs. Adhesive tabs make for a quick and easy installation process and are included with every order.
For larger, permanent or overhead applications we encourage installers to use a construction adhesive like Liquid Nails, Roman-555 Extreme Tack Wallcovering Adhesive, or VHB tape to adhere tiles to wall or ceiling. Felt Right tiles are precision fabricated to allow for seamless installation and are a favorite with the construction trade.
Every order of Felt Right tiles comes standard with adhesive tabs. At checkout, you are given the option to choose between Paint Safe and Commercial tabs. For more information on the difference between tabs, see here.
Our felt wall panels are easy to clean and maintain. To remove dust, all you need is a vacuum wand or hose. For spot cleaning, all you need is a damp rag or household cleaner to spray the tiles and wipe them down. For high-traffic, commercial applications, you can disinfect Felt Right tiles with multi-purpose cleaning products. For more information, see our cleaning guide.
There are 2 important steps to uninstalling Felt Right tiles without damaging paint:
Step 1: Carefully separate each tile from the adhesive tabs.
Tiles are removed, leaving the tabs on the wall surface. This is done by inserting fingers between the tile and the wall, away from the tab location, and gradually applying pressure until the tile separates from the tabs. Avoid pulling the tile directly away from the wall in an abrupt or forceful manner as the tile needs time to release from the tabs.
Step 2: Roll the tabs off the wall.
Once the tile has been removed from the wall, leaving the tabs, then remove each tab from the wall. This is done by starting at a corner of the tab, applying pressure, and rolling the tab off of the wall with your finger or thumb. Avoid pulling the tab directly away from the wall.
If you have difficulty getting the tab to begin rolling, you can use a block pencil eraser to start the process.
Yes, you can use Felt Right tiles for ceiling applications. However, we do recommend using Felt Right Commercial-Grade adhesive tabs to create a stronger, semi-permanent bond.
Felt Right tiles are not suitable for flooring applications.
Felt Right tiles are easily installed with a tape measure, a level and a pencil. Simply orient your first few tiles and then build out your design from there. Most designs can be installed in less than an hour!